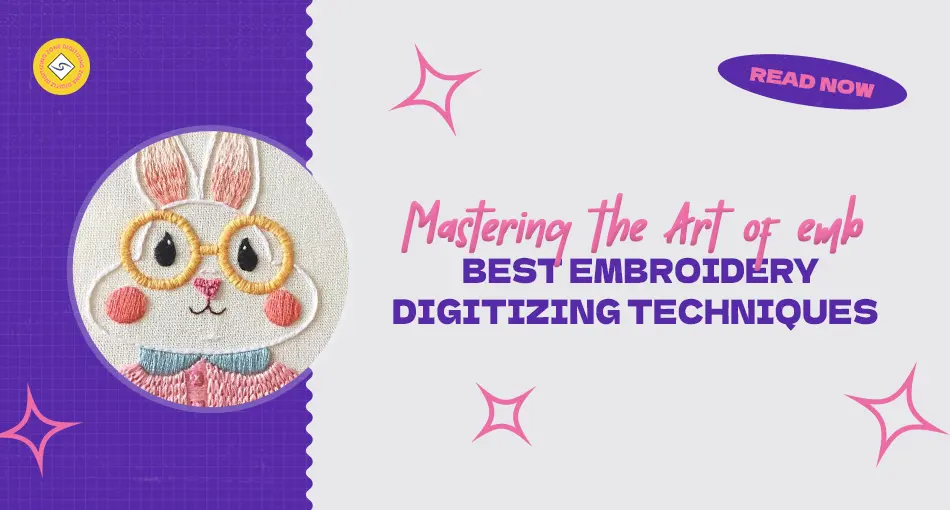
Embroidery is an age-vintage craft that has stood the take a look at of time, evolving from conventional hand-sewing to sophisticated, computer-aided designs. The artwork of embroidery digitizing is vital to this evolution, bridging the gap between creativity and technology. Whether you’re a novice seeking to recognize the basics or a seasoned embroiderer trying to refine your skills, learning embroidery digitizing is vital. This article will explore the best embroidery digitizing techniques, delve into the information of custom embroidery digitizing services, and offer a step-through-step manual for developing beautiful embroidered pieces.
What is Embroidery Digitizing?
Embroidery digitizing is the system of converting paintings into a virtual file that an embroidery gadget can study. This report consists of commands on the way to sew the design, consisting of sew kind, path, and color modifications. The digitizing procedure is vital as it transforms a simple photograph or design into a complicated, device-readable format that may be stitched onto material with precision.
The Importance of Quality Embroidery Digitizing
High-first-rate embroidery digitizing is important for producing crisp, smooth designs. Poor digitizing can bring about choppy stitches, wrong shades, and distorted photos. By gaining knowledge of first-rate embroidery digitizing techniques, you may ensure that your designs are accurately reproduced, leading to a professional and polished final product.
Best Embroidery Digitizing Techniques
Understanding the Design
Before you begin digitizing, it’s essential to understand the design thoroughly. Analyze the paintings, listening to complicated details, colorings, and textures. Understanding the design helps in making plans for the sew kinds and collection, making sure that the final embroidery reflects the original artwork accurately.
Choosing the Right Software
Investing in first-rate embroidery digitizing software is vital. There are several software options to be had, ranging from newbie-friendly to expert-grade. Some famous choices include Wilcom, Hatch, Brother PE-Design, and Pulse. These software programs provide various gear and features that allow you to create targeted and complex designs. When deciding on a software program, recollect your talent level, the complexity of the designs you propose to create, and your price range.
Setting the Right Resolution
The decision of your design performs a sizeable position inside the very last outcome. Higher decision approaches greater detail, however, it additionally calls for more stitches that can boom the manufacturing time and fee. For great effects, strike a balance between detail and efficiency. Typically, a resolution of three hundred DPI (dots according to inch) is appropriate for most embroidery designs.
Layering Techniques
Layering is a technique used to create intensity and size in embroidery. By layering one-of-a-kind stitch kinds and colorations, you could achieve a more sensible and dynamic layout. Start with the historical past elements and regularly work your manner to the foreground, ensuring that each layer is well aligned and stitched.
Compensation for Fabric Type
Different fabrics react differently to stitching, so it is crucial to make amends for the sort of material you are running with. For example, stretchy fabric can also require tighter stitching to prevent distortion, whilst thicker fabrics may want a bigger needle and looser sewing. Understanding how your cloth will behave beneath the needle enables you to decide on the right sew density and type, making sure the design holds its form and look.
Stitch Density Management
Stitch density refers to the variety of stitches in a given location of the layout. Managing stitch density is important to keep away from troubles like puckering, thread breakage, and cloth distortion. A better sew density can create an extra-defined design however can also cause troubles if no longer controlled correctly. Conversely, a lower stitch density might bring about a much less targeted layout. Adjust the stitch density based on the fabric type and the layout’s complexity for the most efficient outcomes.
Color Blending
Color mixing is a way that adds realism and depth to embroidery designs. By cautiously choosing thread colors and varying sew angles, you may create gradients and clean transitions between colorations. This technique is especially beneficial for designs that require shading, such as pictures or distinct paintings.
Testing and Iteration
Before finalizing your design, it is important to check it on a similar material to what is going to be used in the final product. This lets you perceive and accurately any issues, such as incorrect stitch kinds, density problems, or coloration mismatches. Testing is a vital step in studying embroidery digitizing because it ensures that the final product meets your expectations.
Backing and Stabilizers
Using the right backing and stabilizers can appreciably improve the first-class of your embroidery. Stabilizers prevent the fabric from transferring throughout the embroidery technique, ensuring that the stitches stay even and the design stays aligned. The type of stabilizer you operate need to rely upon the cloth type and the complexity of the design. Common types encompass tear-away, reduce-away, and wash-away stabilizers.
Custom Embroidery Digitizing Services
Custom embroidery digitizing services offer tailored solutions for individuals and groups seeking to create specific and customized designs. These services are in particular useful for folks who might not have the abilities or software to digitize their designs themselves.
Benefits of Custom Embroidery Digitizing Services
Expertise and Precision
Professional digitizers have the enjoyment and knowledge to create incredible designs. They recognize the nuances of different fabrics, stitch types, and densities, ensuring that your layout is appropriately reproduced.
Time Efficiency
Digitizing a design may be time-consuming, especially for complicated paintings. By outsourcing this challenge to a custom embroidery digitizing carrier, you can store time and focus on other factors of your enterprise or innovative process.
Customization
Custom services let you create particular designs tailor-made for your precise desires. Whether you want a logo, a monogram, or a detailed piece of artwork, custom digitizing services can convey your vision to life.
Scalability
Custom embroidery digitizing services are best for companies looking to scale their production. Whether you need a single design or hundreds, those services can take care of orders of any length, making sure consistently nice across all pieces.
Step-by way of-Step Guide to Custom Embroidery Digitizing
Creating a custom embroidery layout entails several steps, every requiring interest in detail and very good information on embroidery techniques. Below is a step-with the aid of-step guide that will help you navigate the manner.
Conceptualization
The first step in custom embroidery digitizing is conceptualizing the layout. Start by figuring out the reason for the layout – whether it’s for branding, personalization, or decoration. Sketch out your thoughts and recall the placement of the layout at the fabric. This is also the time to determine the colors, size, and style of the embroidery.
Choosing the Right Software
Once you have a clear idea, select the embroidery digitizing software program that suits your desires. As noted earlier, there are various software options to be had, each with its strengths and weaknesses. Select a software program software that aligns with your ability stage and the complexity of your design.
Importing the Artwork
After choosing your software program, import the artwork you need to digitize. This might be a logo, a drawing, or a digital image. Ensure that the artwork is in an excessive-resolution format to preserve the nice of the very last design.
Setting up the Design
In this step, you will install the layout parameters, consisting of the scale, decision, and sewing types. Pay close interest to the stitch density, as this could affect the very last appearance and sturdiness of the embroidery. Use the layering approach to add depth and size to the layout, and experiment with color mixing to achieve the favored effect.
Digitizing the Design
Now, it’s time to digitize the layout. This technique entails converting the artwork right into a stitch report that the embroidery system can examine. Start with the aid of outlining the design with a strolling stitch, then fill in larger areas with fill stitches. Use satin stitches for borders and textual content to create a smooth, polished appearance.
Preview and Test
Before finalizing the layout, use the preview function for your software program to see how the layout will look while embroidered. Make any important changes to the stitch types, density, or hues. Once you are happy with the digital preview, conduct a check run on a comparable material. This test will help you discover any troubles and make further changes if needed.
Finalizing the Design
After testing and making adjustments, finalize the layout by way of saving it in the appropriate record format for your embroidery gadget. Common formats consist of DST, PES, and EXP. Ensure that the report is compatible together with your gadget to keep away from any troubles at some stage in the embroidery manner.
Embroidering the Design
With the digitized report geared up, load it into your embroidery gadget and start the embroidery method. Make certain to use the best thread shades, needles, and stabilizers for the best outcomes. Monitor the machine as it stitches the design, and be prepared to make any necessary modifications.
Finishing Touches
Once the embroidery is complete, do away with the cloth from the gadget and punctiliously trim any excess threads. If you used a tear-away or wash-away stabilizer, put it in line with the producer’s instructions. Finally, look into the embroidery for any flaws and make any closing-minute corrections.
Conclusion
Mastering the artwork of embroidery digitizing requires a combination of creativity, technical talent, and interest in detail. By understanding the intricacies of your layout, deciding on the right tools, and applying advanced strategies including layering, sew density control, and shade mixing, you could create stunning, professional-pleasant embroidery. Whether you’re handling the digitizing technique yourself or opting for custom embroidery digitizing services, the secret is to ensure precision and first-rate at every step. With practice and staying power, you could remodel any layout right into a beautifully embroidered masterpiece, raising your craft to new heights.